How to Mint the Surge Passport NFT
Buying an NFT for the first time is an exciting experience. The Surge Passport NFT is minting on April 28 for the allowlist, with public sale to follow. We will announce the precise mint dynamics on our Discord and Twitter, but for now, let’s take you through the minting process!
What Is Minting?
Minting is the process of creating a new token on the blockchain. When you mint directly from the website of an NFT project, you are the first owner of a newly created NFT. In the minting process, you will have to connect your wallet and use a cryptocurrency, like Ethereum, to buy the NFT.
Minting is the process of acquiring a unique digital asset that you can truly own as it gets registered on the blockchain.
On the other hand, when you buy an NFT on a secondary marketplace like OpenSea, you’re buying from other people, not directly from the project itself.
Sometimes, buying the NFT directly from the project during the minting window is cheaper than buying the NFT on secondary, especially in the case of successful NFT projects.
Minting the Surge Passport NFT
The Surge Passport is a collection of 5,000 hand-drawn NFTs that represent a spectrum of women from all backgrounds, interests, and age groups.
By collecting a Surge NFT, you’ll gain access to a number of perks across the Web3 space, including access to courses, scholarships, mentorship, and real-life events offered in partnership with mission-aligned organizations.
How to Mint the Surge Passport NFT: A Step-by-Step Guide
To mint your Surge Passport NFT you will need:
🌸 An Ethereum wallet.
🌸 0.08 ETH (around $250), plus a little more (approximately $50-$100) in ETH for gas.
🌸 If you don’t have an Ethereum wallet or ETH, follow the set up instructions below, or you can buy the Surge Passport NFT using your credit or debit card.
The Minting Process
1. Set up an Ethereum wallet.
To mint the Surge Passport NFT, you can use Metamask, Coinbase Wallet, or WalletConnect. Setting up an Ethereum wallet involves a few steps. You’ll need a compatible browser, such as Chrome, FireFox, or Brave, a pen and a piece of paper to store your secret phrase. Read our wallet guide for more detailed instructions.
2. Buy ETH on a cryptocurrency exchange such as Coinbase, Binance, or Kraken.
You’ll need to buy $250 - $350 worth of ETH to mint one Surge Passport NFT. The Surge Passport NFT costs 0.08ETH ~ 250USD, but keep in mind that minting an NFT costs gas, so you’ll need some extra ETH (around $50-$100) in your wallet to cover the cost. You’ll need a bit more ETH for gas if you are minting more than one NFT.
If you’re buying cryptocurrency for the first time, read our step-by-step guide to walk you through creating an account, buying, sending, and swapping cryptocurrencies on Coinbase. If you’re using another cryptocurrency exchange, you can watch this tutorial for purchasing crypto on Kraken or this quick guide to buying crypto on Binance.
Note: Coinbase works in the US, while you can use Kraken and Binance globally.
3. Send ETH from your cryptocurrency exchange wallet to your Ethereum wallet.
On your chosen cryptocurrency exchange, look for the “Send/Receive” button. You will need to copy and paste your Ethereum wallet address in the “To” section. Double-check that the address is correct, since transactions are not reversible.
Need more details about sending crypto from an exchange wallet to a digital wallet? Here’s a step-by-step guide to help you send ETH from your exchange wallet to your Ethereum wallet.
4. Now that you have your Ethereum wallet set up and funded, you’re ready to mint the Surge Passport NFT!
Visit our official minting site: nft.surgewomen.io.
Once you’re on the site, connect your Ethereum wallet. In the pop-up window, select your wallet provider (Metamask, Coinbase Wallet, or WalletConnect) and connect.
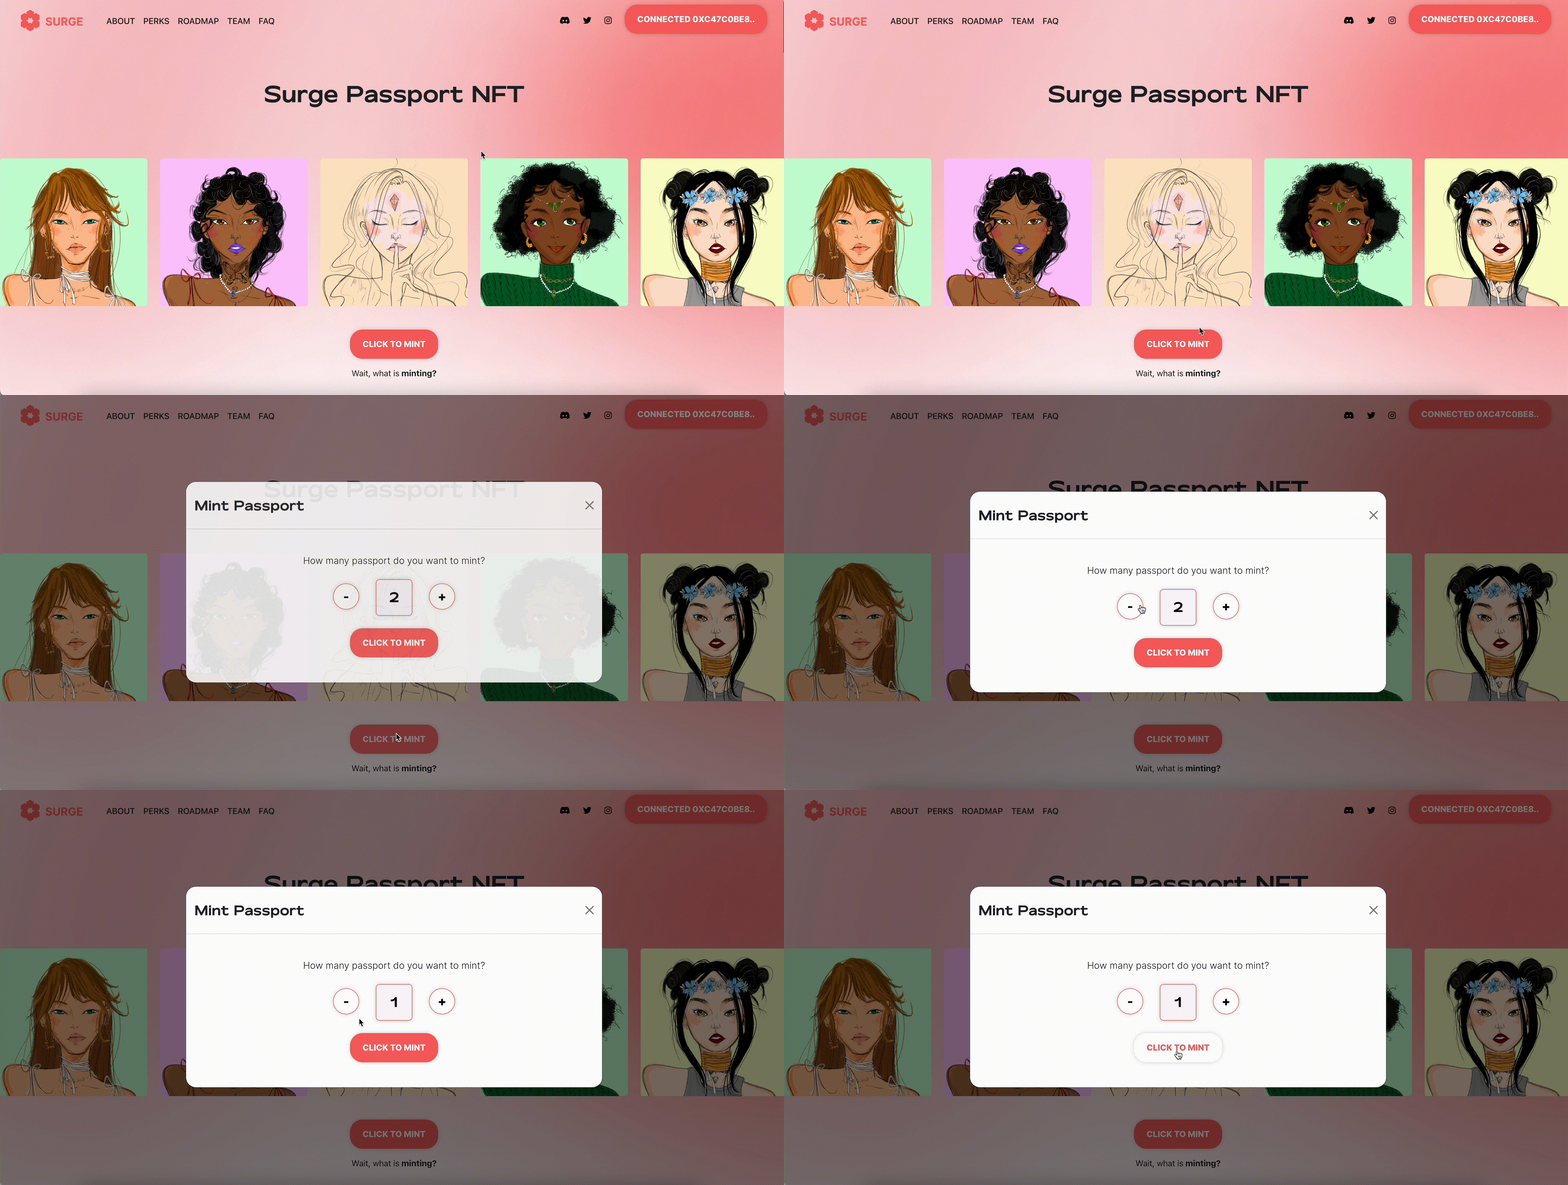
5. Click the “Mint” button and select the amount of NFTs you want to buy.
You can mint a maximum of 5 Surge Passport NFTs. Keep in mind that the gas fee will NOT increase much the more NFTs you mint. Our contract is optimized to save gas on batch minting.
However, If you’re buying with a credit card, you will only be able to mint one NFT.
6. After clicking the “Mint” button, your wallet will prompt a message and you will be asked to approve the transaction to mint the NFT.
A breakdown of the cost of the NFT and gas fee will be shown to you. If you have enough ETH in your wallet, click the “Confirm” button to proceed with the transaction. NOTE: Do not confirm minting unless you have enough ETH for both the NFT and gas. Your transaction will fail but you will still be charged gas by the Ethereum network.
7. Wait for your transaction to go through.
Depending on how busy the Ethereum network is, it might take a few minutes before your transaction goes through. You can view the status of your transaction by navigating to the “Activity” section of your Metamask wallet.
8. Congratulations! You now have a Surge Passport NFT and can claim some awesome perks.
We’ve created the Perks Dashboard where you can see all the perks that come with the Surge Passport NFT. Perks include education, Web3 tools, and financial perks, offered by some of the top Web3 organizations.
NOTE: If you mint using Crossmint, you will have to take some additional steps to claim perks. More on that below.
Buying the Surge Passport NFT with a Credit Card
If you don’t have an Ethereum wallet yet, you can purchase the Surge Passport NFT with your credit or debit card. Upon the reveal, you will be able to see your Surge NFT in the Crossmint interface. You won’t need an Ethereum wallet immediately upon minting the Surge Passport NFT, but you will need it later on to access Surge Passport NFT perks, and if you want to list and sell your NFT on secondary markets.
Here’s how to buy the Surge NFT with your credit card:
Go to the “Click to Mint” button on the Surge minting site.
Rather than choosing Mint NFT with ETH, select the Buy with Credit Card option.
This will prompt a message asking for your email address.
After you hit submit, you’ll receive an email with a link for you to proceed with the payment.
Add your credit card information and wait for the mint! Keep in mind that when you pay with a credit card, you will only be able to mint 1 NFT and will pay an additional 4.5% fee for the service.
Once minting is done, you’ll receive an email with a link taking you to see your NFT!
If you want to use your NFT to claim perks, you will need to export the NFT into a wallet.
Things to Keep in Mind
Connecting your wallet to the Surge minting site is similar to logging in to a website. By connecting your wallet, the website will be able to see your wallet address and suggest transactions to approve. Since connecting your wallet is not an on-chain event, you won’t be paying any gas fees.
After clicking the mint button, you will be asked to approve the transaction to mint the NFT. Approving the transaction allows the smart contract to spend a specific amount of ETH in your wallet. You will be able to see a breakdown of how much the NFT costs plus the gas fees at that time.
If you do not have enough funds for gas, you won’t be able to proceed with the transaction or your transaction might fail. Make sure you have enough ETH in your wallet to successfully mint the NFT.
It’s important to make sure that you are minting from the project’s official site. Only click links from the project’s official Twitter account and Discord channel. Remember that you will never be asked for your seed phrase during this process. All announcements are made on Twitter and Discord, so DO NOT click links sent through direct messages on Discord or tweets that you might get tagged in on Twitter.
If you’re not sure where to find the link or have any issues or questions, you can open a support ticket in the Surge Discord or tag a team member in any of the channels to get support.
After Minting - The Surge Passport NFT Perks and the Reveal
After your transaction to mint is successful, the Surge Passport NFT will be transferred to your wallet. You can view your newly minted NFT in your OpenSea account by visiting your OpenSea profile. If you’re new to OpenSea, read our guide to help you navigate the platform.
You can also use Etherscan to confirm that the NFT is in your wallet even before the reveal. Simply copy your wallet address into the search bar and you’ll see all transactions and tokens in your wallet. It might take a couple of minutes after the mint until the token appears in your wallet.
Depending on your wallet provider, you may or may not be able to view your NFT in your wallet. The Metamask browser extension, for example, currently does not support the ability to view NFTs. However, if you have Metamask on your mobile device, you can view your NFT there.
NOTE: Generative NFT projects like the Surge Passport usually have a roll out schedule for when the art will be revealed. In the meantime, you will have a pre-reveal art placeholder, which is the same for all NFT holders of the collection. NFT projects have a pre-reveal period to ensure that the minting is happening according to plan and the NFTs are in the right hands.
This means that after the mint, you will be able to see the token in your wallet, but the specific PFP you minted will be revealed after the public mint is over.
Once you own a Surge Passport NFT, you can access your Web3 perks immediately. Visit the Perks Dashboard to view and claim your NFT perks. More perks will be revealed as we approach minting day.
Happy minting!
Stay tuned for NFT announcements and updates by following Surge on Twitter and joining our community on Discord! Feel free to ask any and all questions as we approach mint day.


